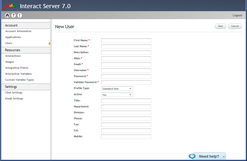
Creating New Users
The New User button opens the New User page, which enables you to create a new user for the account.
1.At the upper right corner of the Users page, click New User. The New User page opens. 2.Enter the following parameters in the appropriate textboxes: •First name: The user's given name. •Last name: The user's family name. •Description: Notes or comments related to the user. This parameter is optional. •Alias: A friendly name by which the user is known. •Email: The email address to which system notifications will be sent. 3.In the Username textbox, enter a unique credential to be used for accessing the Admin Console. The username may be in email format, but it does not need to be the user's actual email address. 4.In the Password textbox, enter the credential to be used for accessing the Admin Console. Then, re-enter the password in the Validate Password textbox. 5.From the Profile Type dropdown, select the appropriate profile for the new user: •Standard User: A non-administrative user. •Administrator: The user has administrative privileges. These users can inactivate other users and change the passwords of other users. 6.From the Active dropdown, select the desired status of the new user: •Yes: The new user will be active. (The user is able to perform all operations as expected.) •No: The new user will be inactive. (The user is unable to perform any operation that requires authentication.) 7.If desired, enter relevant user details in the remaining fields (Title, Department, Division, Phone, Fax, Ext., and Mobile). 8.If desired, change the default setting(s) of the Locale, Display Language, and/or Time Zone parameter(s) by selecting the relevant value(s) from the dropdown list(s). 9.Click Save. Account details are saved, and the new user is displayed in the Users List. |

