Working with Integration Points
The following sections explain various administrative procedures for managing integration points. The procedures that you have authorization to perform can vary according to your administration role and permissions.
Approved integration points are available in the Interaction Designer, and can be used when running Interactions. Integration points in Draft status can be approved by authorized administrators, following review and testing. Multiple integration points may be approved at once. To approve an integration point: 1.At the left side of the Web Service Integration Points page, select the checkbox(es) in the row(s) of the relevant integration point(s). Then, at the top of the page, click Approve.
A Confirm Approval popup window appears. 2.In the popup window, click Yes. A confirmation message is displayed. In the Integration Points grid, the status of the selected integration point(s) changes from Draft to Approved. |
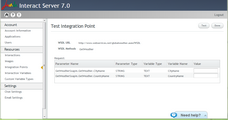
Testing an integration point involves navigating to the Test Integration Point page and then verifying that the integration point behaves as expected. You will need to enter test input values, according to the structure of the specific integration point being tested. To test an integration point: 1.Navigate to the Test Integration Point page, in one of the following ways: oFrom the Integration Points page: At the left side of the page, select the checkbox in the row of the relevant integration point. Then, at the top of the page, click Test.
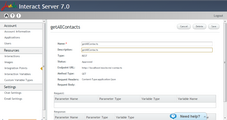
oFrom the Integration Point Details page: At the top of the page, click Test. 2.On the Test Integration Point page, enter test input values as required. Then, at the upper right corner of the page, click Test. Test results are shown at the bottom of the page. 3.To navigate back to the Integration Points page at any time, click Done. |
Editing an integration point involved updating the name and/or description of the integration point. The other parameters may not be updated through the Admin Console. Instead, the integration point needs to be re-created (after which the original one may be deleted). To edit an integration point: 1.From the Name column of the Integration Points grid, click the link in the row of the relevant integration point. The Integration Point Details page is displayed. 2.At the upper right corner of the page, click Edit. The Name and Description fields become editable. 3.Update the name and/or description as required. Then, at the upper right corner of the page, click Save.
A confirmation message appears, and the updated details appear in the Integration Points grid. |
Deleting an integration point removes it from the Integration Points grid. The Delete function can be accessed from either the Web Service Integration Points page or the Integration Point Details page. If you are working from the Web Service Integration Points page, multiple integration points may be deleted at once. To delete integration points: 1.At the left side of the Web Service Integration Points page, select the checkbox(es) in the row(s) of the relevant integration point(s). Then, at the upper right corner of the page, click Delete. A Confirm Deletion popup window appears. 2.In the popup window, click Yes. A confirmation message is displayed. The selected integration point(s) are removed from the Integration Points grid. |


