Installing the Interaction Server

Contents
Installing the Jacada Interaction Server is done using an installation wizard, which is accessed from a .jar file provided with the installation package. This wizard installs the web server and the database. The wizard also creates the default application configurations required for using the Jacada Interaction Server Admin Console, the Jacada Interaction Designer, and other additional applications (e.g. Mobile Self Service application, Agent Application etc.). However, the use of these applications is enabled only after you upload an appropriate license (Uploading Your License File) and install the Interaction Designer.
Installation Prerequisites
Before installing the Interaction server:
•Verify that hardware and software requirements are met.
•Verify that the JAVA_HOME environment variable is pointing to the required Java version.
•Verify that you have administrative privileges. (The installer must be run with administrative permissions.)
1.Verify that MongoDB is installed and running. 2.Open the jacada-interact-installer.jar file. The following splash symbol appears while the wizard is opening:
If you already have an instance of Jacada Interaction Server installed, the following warning appears:
To continue with the installation process, click Yes. Then, from the popup window that opens, click OK.
3.From the Welcome page of the wizard, click Next.
The Choose Install Location page opens, with the default installation path displayed.
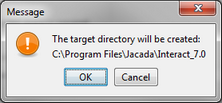
4.If desired, change the default installation path by clicking Browse, and then navigating to the required directory. Then, click Next. A confirmation message is displayed.
5.From the popup window, click OK. The Database Configuration Settings page opens.
6.Configure your database settings by entering the database host and port in the appropriate fields. 7.If credentials are required for database access, enter the relevant username and password in the appropriate fields. Then, re-enter the password in the Confirm password field. 8.Test your settings by clicking Test connections. Then, click Next. The Account Configuration Settings page opens.
9.Configure your default account by defining the following settings: •Account Name: The name of your account. Generally, this is your company name. •Admin Username: Initially there must be one default user with administrative privileges, who can add more users and perform other management operations using the Admin Console. Enter the username of this user in the textbox. •Admin Password: Enter the password for the default admin user. Then, re-enter the password in the Retype password textbox. 10.Click Next. The Review Settings page opens.
11.After reviewing the settings that you configured, click Next. The installation begins. Progress bars are displayed as the installation process proceeds. 12.When the progress bars complete, click Next. The Processing page appears while the database is being installed.
13.Click Next until all processing is complete.
14.When processing is completed, click Next. The Setup Shortcuts page opens.
15.Select the Current User or All Users radio button. To change the default shortcut path, select a program group from the list. 16.Click Next. Installation is completed. The Installation Summary page appears, displaying the following information: •The account name and credentials for the system account. These credentials are used to view all accounts. •Quick links to access relevant applications and documentation.
17.Click Next. The final page of the wizard opens.
18.To exit the wizard, click Done. |


For a description of the components that are created during the installation, refer to Installation Components.
Note: If it is necessary to uninstall Jacada Interaction Server, the uninstall procedure needs to be done from the control panel (Add/Remove Programs). |