Creating Your First Interaction
An Interaction is a file containing a visual representation of any workflow used in the customer service environment. Interactions can be designed to be agent directed, or to be used as a self service script. Each component of the workflow is called an Interaction element. Elements are added to the flow by using either the Insert menu, or by clicking the relevant toolbar icon.
![]()
The following sections explain how to create a simple Interaction using an opening Statement, a multi-choice Question (What is your favorite color?), and 2 Choice elements. One of the Choices is followed by a Statement (Blue is a great color). The Interaction flow is illustrated in the following diagram:
The workflow for creating the Interaction is:
1.Open the Interaction Designer.
2.Create a new Interaction.
3.Add an opening Statement element.
4.Add a Question.
5.Add Choice elements.
6.Add another Statement.
7.Test the Interaction.
•If you downloaded and installed the Interaction Designer, open the Designer from the Start menu, or double-click the desktop icon. •If you are a Trial user, access the Admin Console, and click Launch Designer. |
1.From the File menu, select New. Alternatively, from the toolbar, click The Interaction Settings dialog opens. 2.In the Name textbox, replace the default name (Interaction) with a relevant name for your Interaction.
3.If desired, enter appropriate free text notes in the Version and/or Description fields.
4.Click OK. The new Interaction is added to the Interaction List, and a blank screen is displayed in the Interaction Map. |
Statements allow you to display information to users in a formatted way. They enable you to share information with users, instead of collecting information from them. 1.From the toolbar, click The Statement Definition dialog opens. 2.In the Reference name field, enter the name of the Statement element. What you enter here is the name by which the element is referred to in the Designer. In our example, the reference name is Hello. 3.In the Display area, enter and edit the rich text that will be presented in the Statement. The text can include images, links and other HTML elements. Clicking Editor launches the Interaction Designer text editor, which features numerous formatting options. 4.In the Page Title textbox, enter the text to be displayed in the title bar of the page that is displayed to the user. 5.Click OK. |
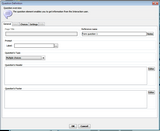
Question elements enable you to obtain information directly from users. Questions are essential elements of most Interactions. Their use is widespread and very flexible. Question elements are designed to be answered either by the user entering input, or by the user selecting one or more preconfigured choices. In our example, the Question will be followed by two Choice elements. 1.From the toolbar, click The Question Definition dialog opens, with the General tab displayed by default. 2.Enter a page title and a reference name in the appropriate fields. 3.In the Prompt frame, in the Label textbox, enter What is your favorite color? 4.Click OK. The Question Definition dialog closes. 5.Insert a Connector between the Statement and the Question: a. Hover the mouse pointer over the Statement element, until the cursor becomes a cross hair (+). b. Press the left mouse button. While holding the button down, drag the mouse to the Question element, and then release the button. |
Choice elements provide a set of options which with users can answer a given Question. Each Choice element represents one option. In our example, we will add 2 Choice items, and connect them to the Question element. 1.From the toolbar, click The Choice Definition dialog opens. 2.In both the Reference name field and the Choice/Button Label field, enter Orange. Then, click OK. The Choice Definition dialog closes. 3.Repeat Steps 1-2 to create a second Choice element, called Blue. 4.Draw Connectors between the Question element and each of the 2 Choice elements. |
We will now add another Statement element. The text of the Statement will be displayed to users who select the Blue choice. 1.From the toolbar, click The Statement Definition dialog opens. 2.Enter a page title and a reference name in the appropriate fields. 3.In the Display area, enter Blue is a great color! Then, click OK. The Statement Definition dialog closes. 4.Draw a Connector between the Blue Choice element and the new Statement. |
Now we will run the Interaction inside the Designer, to ensure that the flow behaves as expected. •Right-click on the first Statement element (Hello), and then select Run. The Interaction is displayed in the simulator in the Interaction User pane. Navigate through the Interaction by using the navigation buttons (Next and Back) and selecting the desired choice option. |


