Creating Decision Elements

Contents
A Decision element evaluates a set of conditions, and then sends the user in an appropriate direction based on its rules. It is capable of reading from internal values, variables, Question responses, and other elements, and evaluating those values to determine the appropriate decision.
The Decision item uses standard comparators (equals, does not equal, greater than, less than, greater than or equal to, less than or equal to) according to what type of variable value is being evaluated. The choice of comparators is dynamically assigned according to the variable type.
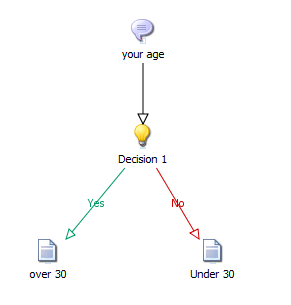
In the following example, users are asked to enter their age. The user will then see one of two Statements, according to the value provided. The Interaction will appear as follows:
1.From the toolbar, click The Question Definition dialog opens, with the General tab displayed by default. 2.Enter a page title and a reference name in the appropriate fields. 3.In the Prompt frame, in the Label textbox, enter How old are you? 4.From the Question's Type dropdown list, select The user can provide input.
5.At the top of the dialog, select the Input tab. From the Input Type dropdown list, select Number.
6.Click OK. The Question Definition dialog closes. 7.From the toolbar, click The Decision Definition dialog opens.
8.At the bottom of the dialog, click Add Condition. Three dropdown lists appear. 9.From the dropdown on the left, expand the Question elements node, and select the reference to the relevant Question.
10.From the dropdown in the middle, select less than. 11.Clear the Use existing element checkbox. Then, in the field below the checkbox, enter 30.
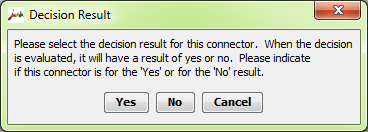
12.Click OK. The Decision Definition dialog closes. 13.Draw a Connector from the Question to the Decision element. 14.From the toolbar, click The Statement Definition dialog opens. 15.Enter a page title and a reference name in the appropriate fields. 16.In the Display area, enter You are under 30. Then, click OK. The Statement Definition dialog closes. 17.Repeat Steps 14-16 to create a second Statement element (to follow a No decision). In the Display area, enter You are over 30. 18.Draw a Connector from the Decision to the first Statement (the one to be connected to the Yes decision). The Decision Result popup opens.
19.From the popup, click Yes. 20.Draw a Connector from the Decision to the second Statement (the one to be connected to the No decision). By default, this Connector will be labeled No. 21.To test the Interaction, right-click on the Question element, and then select Run. The Interaction is displayed in the simulator in the Interaction User pane.
|