Allocators
This item is used to make changes to the value of variables. A change to a variable value is called an allocation. An Allocator item can include more than one allocation.
You could create an application that works out the age of a dog in human years, based on input from a user. The Allocator would be used to allocate the age of the dog, using a formula to represent the theory that each year for a dog is the equivalent of 7 human years: •dog_age = 3 •human_age = 7 * dog_age In this example, the Allocator would allocate the value of 21 to human_age (which is the result of the formula calculation). This would be a single allocation. If required, an Allocator can perform lots of allocations in a single operation. The Allocator represents the entire operation of taking the formula (dog age * 7) and assigning the outcome to a variable (human_age). In this simple example, the user would need to create a variable to hold the dog age, another variable to hold the human age representation, a constant to represent the multiplier in the formula (or simply use the actual value of 7 in the formula), and the formula itself. These items can then all be used to create an Allocator element. |
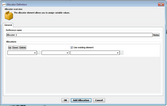
Creating an Allocator involves selecting options from the dropdown lists of the Allocator Definition dialog: •Left-hand dropdown: Specifies the variable that the allocation will change. You can also create a new variable. •Center dropdown: Enables you to add a value to the variable, set the variable (using equals), or subtract from the variable. The Equals is used to perform a straight allocation. If the variable is some form of counter, the operation may be set to Add (to count up) or Subtract (to count down). •Right-hand dropdown: Enables you to either set a hard coded value for the variable, or to select an existing element that determines the value of the variable. Other settings are described in the following table:
|

