Inserting Images

Contents
The Interaction Designer enables you to use images in the following situations:
•Images can be inserted into any HTML content (e.g., when composing a Statement using the HTML Editor). HTML-related images can be selected from the Image Library, or can be specified using any external URL. Using the Image Library enables you to better adjust image size to different screen sizes.
•An image can be inserted into a Choice Interaction element. In this case, the image must be chosen from the Image Library.
The Image Library is a collection of images that is stored on the Interaction Server. Each tenant has a unique image collection in the Image Library.
The Image Library stores each image in several different sizes. This allows designers to select the appropriate image size, according to the screen size of the user environment (agent desktop, smartphone, etc.). A default list of image sizes is provided in a configuration file, as part of the server installation.
1From the toolbar of the HTML Editor, click The Insert Image Location dialog appears.
2Select the Provide an absolute URL location of your image radio button. The Browse button is enabled. 3Enter the URL of the image in the field. Alternatively, click Browse, and then navigate to and select the relevant image.
4Click OK. The image is inserted. |
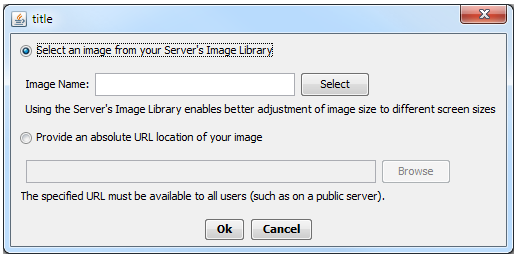
1From the toolbar of the HTML Editor, click The Insert Image Location dialog appears.
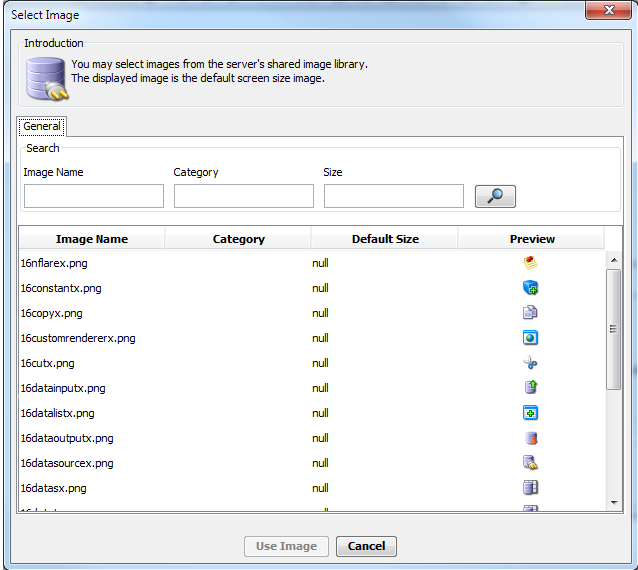
2Select the Select an image from your Server’s Image Library radio button. The Select button is enabled. 3Click Select. The Select Image dialog opens, with a list of all available images displayed.
4If desired, filter the image list by specifying one or more of the following filter types: •Image Name: Enter part or all of the name of the required image. •Category: Select from the list. •Size: Select from the list. Then, click 5Select an image from the list. The Use Image button is enabled. 6Click Use Image. The selected image is inserted. |