Inactivating Applications

Contents
The Inactivate button enables you to temporarily inactivate one or more applications. When an application is inactivated, its application key is disabled, and users are thus unable to access Interactions using that application.
Note: The default out-of-the-box applications (Admin Console, Designer, and Agent History only) cannot be inactivated. |
The Inactivate button appears on the following pages:
•Applications page: From this page, multiple applications can be inactivated simultaneously.
•Details pages of individual applications: From this page, only the application for which details are displayed can be inactivated.
Note: Individual applications may also be inactivated by updating their settings. For details, refer to Understanding Application Settings. |
To inactivate an application from the Applications page:
1.At the left side of the Applications page, select the checkbox(es) in the row(s) of the application(s) that you want to inactivate.
The Inactivate button is enabled.
Note: If an application is already inactive, the Inactivate button remains disabled when the application is selected. |
2.At the upper right corner of the page, click Inactivate.
A confirmation message is displayed, and the selected application is inactivated.
To inactivate an application from an application's Details page:
1.From the Applications page, click the link in the row of the application that you want to inactivate.
The application's Details page is displayed.

2.At the upper right corner of the page, click Inactivate.
A popup warning opens.
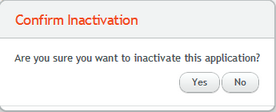
3.From the warning popup, click Yes.
A confirmation message is displayed, and the application is inactivated.