Working with Custom Types in REST IP Responses
As data received from web services generally return as a structured data (e.g., a customer), it is useful to map the response into a custom variable type (object). When you select an existing custom type, it is important to verify that the fields (i.e., keys) of the selected custom type are an exact match to the data that is returned in the JSON response.
At times, it is necessary to modify a custom type. For example, you may need to add or remove fields to to accommodate different environments, or you may need to change the mapping to support nested objects. The following sections explain how to create a new custom type, and how to perform manual field mapping.
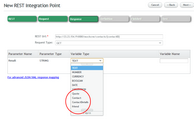
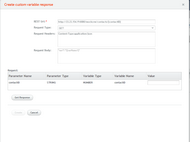
The New Custom Type option enables you to add a custom variable type created specifically to hold the data returned by a web service. The custom variable type is added from the New Integration Point wizard, during the Response definition phase. To add a new custom variable type: 1.At the bottom of the Variable Type dropdown list, click The Create button appears. 2.Click Create. The Create custom variable response popup opens. 3.At the left side of the popup, click Get Response. The integration point response is parsed, and the fields are displayed. 4.In the Name for new custom type textbox, enter a relevant name. 5.For each field, in the Alias column, change the value to a friendly name of your choice. When necessary, select the correct variable type from the Type dropdown list. (By default, all fields are assigned a Text type.) 6.Customize the list of fields as required: •To delete an unnecessary field, click the Remove link in the relevant row. In runtime, the field will be ignored. •To add a field that will be required later (e.g., in a different environment), in the last row of the grid, enter the path, key and alias in the appropriate fields, and select the relevant type. Then, click Add. 7.At the bottom of the popup, click Create. The new custom type is saved in the system. |
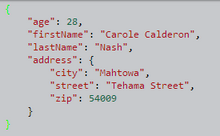
The Details feature enables you to manually edit mapping between response elements and the fields in an existing custom variable type. This advanced technique is useful when the necessary keys are not at the root of the response, or when you are working with a custom type that is used with slightly different integration point responses. The following response is an example of a nested object whose fields (city, street, and zip) would require manual mapping.
Manual field mapping is done from the New Integration Point wizard, during the Response definition phase. To perform manual mapping: 1.From the Variable Type dropdown list, select the required custom type. Then, click Details. The Create custom variable response popup opens. The Key, Alias, and Type columns are read-only. 2.For each relevant field, in the Path column, modify the path as required. 3.At the right upper corner of the popup, click Save. The popup closes, and changes are saved in the system. |


