Adding a REST Integration Point
A new REST integration point is created using the New REST Integration Point wizard. The process involves providing a REST service URL, selecting a request type, and defining the request headers and body (if required). The URL, headers and body may all contain parameters. Request and response parameters can be mapped to Interaction Server variables, so a web service call with those variables can be activated from a running Interaction.
A REST integration point response can be configured using one of the following options:
•Basic response mapping: The response is mapped into a single variable (simple, custom, or collection).
•Advanced JSON/XML response mapping: Enables parsing of a JSON or XML responses into separate variables. Advanced mapping is useful when the required variable is part of a complex type. Multiple parameters and variables can be defined.
The parameter name is an element inside the JSON or XML response. For example:
{ customer: { ssn: 12345678, name: smith, address : { zip: 1234 state: NY } } } |
To access specific fields inside a complex response, dot notation can be used. For instance, in the above example you can use customer.ssn to get to an ssn field inside a customer object, and then map it to a TEXT variable. To access an address field, you can use customer.address, and map it to a matching custom variable type.
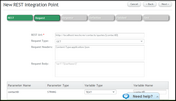
1.At the top of the Integration Points page, click Add, and then select REST. The New REST Integration Point wizard opens. 2.Configure the following settings, as required. (Only the REST URL is a required parameter.) •REST URL: The URL format may include parameters in brackets, such as: http(s)://[host]>:[port]/[app name]/version/[version]/account/[accountId]/interaction/[interactionId]/[interactionInstanceId]/[elementId]. •Request Type: Select the required type from the dropdown list (GET, POST, PUT, DELETE). •Request Headers/Body: These may include parameters in brackets such as: content-type:{$type}. 3.Click Next. The Request page is displayed. 4.For each parameter, in the Variable Type column, select the appropriate parameter type. Then, if desired, in the Variable Name column, change the default name to a more meaningful name. The name assigned in this column is the one displayed to users in the Interaction Designer. 5.Click Next. The Response page is displayed, with basic response mapping displayed by default. •To use basic response mapping: From the Variable Type dropdown, select the appropriate parameter type.
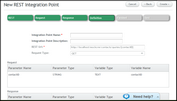
In the Variable Name column, enter a meaningful name for the variable. The name assigned in this column is the one displayed to users in the Interaction Designer •To use advanced response mapping: Click the link at the bottom of the page. For each parameter, enter a parameter name and variable name, and select the appropriate variable type. (Refer to the examples provided before the procedure.) To add a new row, click Add. 6.Click Next. The Definition page is displayed, listing the request and response parameters. 9.At the top of the page, enter a relevant name and description in the appropriate fields. Then, click Create. A confirmation message appears, and the Finished page is displayed. 10.To exit the wizard, click Done.
|


