Building a Repository Tree

Contents
The Repository tree is built by adding applications and then capturing the application elements (controls and tables) that are required for your automation process. The following sections describe how to:
•Add applications
Adding Applications
Adding a application to the Repository involves selecting the application from a list of open applications, and specifying the application's ProgId and title.
Note: Only applications that are currently running on your desktop may be added to the Repository. |
To add an application:
1.At the upper left corner of the Repository pane, click ![]() , and select Application.
, and select Application.
Alternatively, from the Repository tree, right-click on the Repository name (e.g., RepositoryA), and select Add Application.
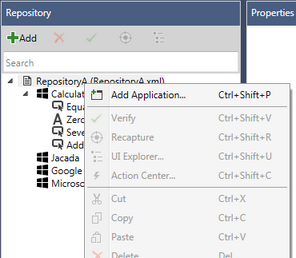
The Add Application popup opens, listing all the currently running applications.
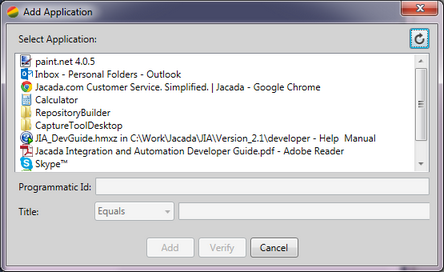
2.From the applications list, select the application you want to add to the Repository.
The Programmatic Id and Title fields are automatically populated. The title is used as a binding attribute for the application.
3.If relevant, modify the default title by selecting the appropriate logic expression and editing the text in the Title field.
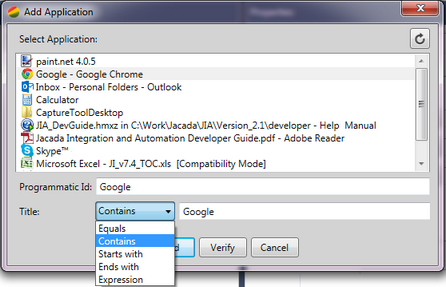
If you change the default title, it is recommended to click Verify to ensure that JIA can locate the application.
4.Click Add.
The Add Application popup closes. The selected application is listed in the Repository pane, and its properties are displayed in the Properties pane.

Capturing Controls
Application controls are added to the Repository by capturing the required elements using the Repository Builder's capturing capabilities. The following general options for capturing elements are provided:
•Add application control: Use this option to capture any supported control (such as buttons, labels, textboxes, etc.) of a standard, Web or Java application.
•Add type control: Use this option to capture controls of specified types. The Repository Builder offers several options that enable you to easily capture elements that are more difficult to select manually from the application. For example, the Add Data Grid option (provided for standard applications) is specially designed to easily select a table, and avoids capturing table text and other table content. Other type control options include:
oAdd Web Form
oAdd Web Table
oAdd Java Table
Like applications, once a control or table is selected (by capturing it), its ProgId and binding attributes are automatically identified by the Repository Builder.
The Repository Builder provides the following means of capturing controls:
•Capture Tool: Allows you to select a control using a drag-and-drop technique.
•UI Explorer: Allows you to select a control from a control tree.
Adding Controls Using the Capture Tool
The capture tool, which is designed to be compact and unobtrusive, is made up of the following icons:
|
Enables you to capture a specific portion of an application. |
|
Closes the capture tool and displays the Repository Builder interface (which is hidden while the capture tool is open). |
|
Enables you to reposition the capture tool on the screen using a drag-and-release technique. |
The following procedure demonstrates how to use the capture tool, using the Windows calculator as an example. Note that the Calculator application needs to be open on the desktop in order to capture its controls.
To capture a control using the capture tool:
1.Verify that the relevant application is running and that it has been added to the Repository. (Refer to Adding Applications.)
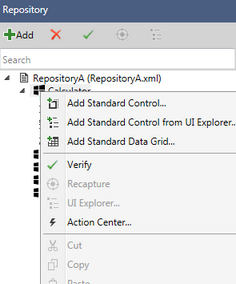
2.At the upper left corner of the Repository pane, click ![]() , and select Standard Control.
, and select Standard Control.
Alternatively, from the Repository tree, right-click on the relevant application (e.g., Calculator), and select Add Standard Control.
The capture tool opens, and the Repository Builder interface is hidden.
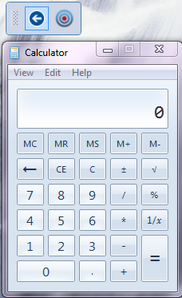
3.From the capture tool, click ![]() . While still holding the left mouse button down, drag the mouse pointer over the relevant application until the required control is indicated by a blue frame.
. While still holding the left mouse button down, drag the mouse pointer over the relevant application until the required control is indicated by a blue frame.

4.Release the mouse button.
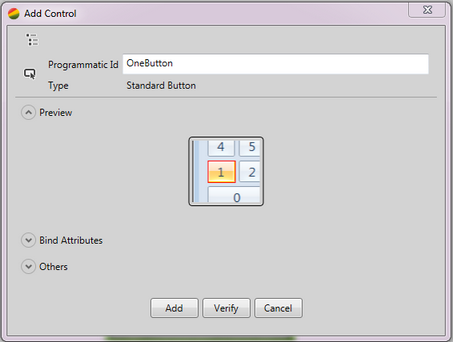
The Add Control dialog opens, displaying the automatically generated ProgId, the control type, and a preview of the selected control. Clicking the preview opens a full view of the entire application (or browser page) so you can see the selected control in a broader context.
The Bind Attributes and Others portions of the dialog list additional properties of the control.
5.If the control is not the one you intended to capture, at the upper left corner of the Add Control dialog, click ![]() to open the UI Explorer. For details about using the UI Explorer to adjust your selection, refer to Adusting a Selection Using the UI Explorer.
to open the UI Explorer. For details about using the UI Explorer to adjust your selection, refer to Adusting a Selection Using the UI Explorer.
6.To view the default properties of the control, expand the Bind Attributes and Others portions of the dialog. The attributes that are selected are the ones that will be used to identify the control in the Repository.

For descriptions of the different binding attributes, click here. If you choose to modify the default attributes, it is recommended to click Verify to ensure that JIA can locate the control.
7.Click Add.
The selected control is added to the Repository as a node of the relevant application. The capture tool remains open so you can continue capturing other controls.
8.Repeat Steps 3-6 to capture additional controls.
9.When all required controls for the application have been added to the Repository, close the capture tool by clicking ![]() .
.
Adding Controls Using the UI Explorer
This option involves selecting controls by investigating the UI tree. Using the UI Explorer to add controls is particularly helpful when working with applications with hidden overlays that make it difficult to access all controls using drag-and-drop.
To capture a control using the UI Explorer:
1.Verify that the relevant application is running and that it has been added to the Repository. (Refer to Adding Applications.)
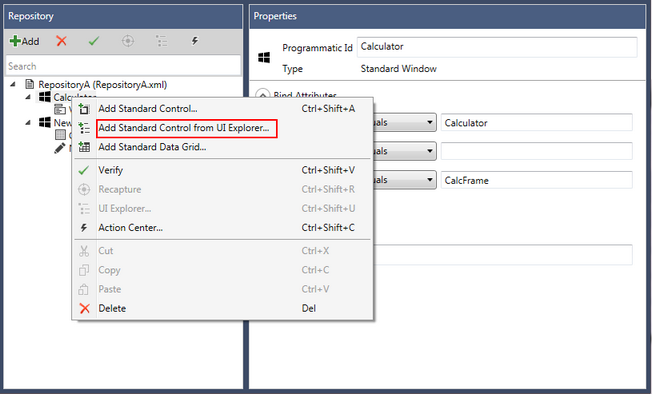
2.At the upper left corner of the Repository pane, click ![]() , and select Standard Control from UI Explorer.
, and select Standard Control from UI Explorer.
Alternatively, from the Repository tree, right-click on the relevant application (e.g., Calculator), and select Add Standard Control from UI Explorer.
The UI Explorer popup opens, displaying a collapsed tree of available controls.
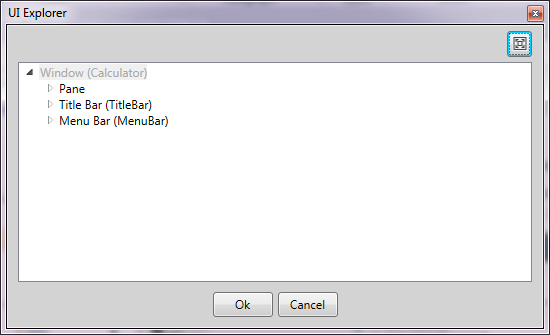
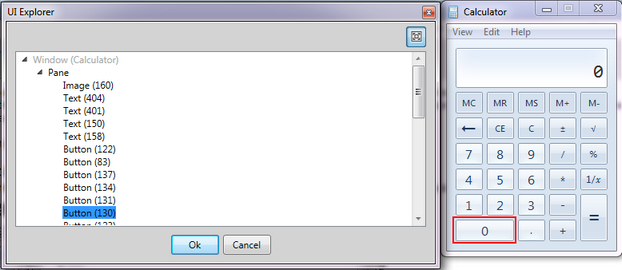
3.Expand the relevant node of the tree, and select the required control.
In the application, the currently selected control is indicated by a red frame.
Note: To make the red frame visible, verify that the |

4.Click OK.
The Add Control dialog opens, displaying the automatically generated ProgId, the control type, and a preview of the selected control. Clicking the preview opens a full view of the entire application (or browser page) so you can see the selected control in a broader context.
The Bind Attributes and Others portions of the dialog list additional properties of the control.
5.To view the default properties of the control, expand the Bind Attributes and Others portions of the dialog. The attributes that are selected are the ones that will be used to identify the control in the Repository.
For descriptions of the different binding attributes, click here. If you choose to modify the default attributes, it is recommended to click Verify to ensure that JIA can locate the control.
6.Click Add.
The selected control is added to the Repository as a node of the relevant application. The UI Explorer remains open so you can continue selecting other controls.
7.Repeat Steps 3-6 to capture additional controls.
8.When all required controls for the application have been added to the Repository, close the UI Explorer by clicking Close.
Adjusting a Selection Using the UI Explorer
The UI Explorer tool enables you to specify the exact control you need by selecting it from a tree. The tool can therefore be used to modify captured elements that require slight adjustments to correctly match the control that was intended to be captured. For example, you can use the UI Explorer to capture a control that is overlayed by another element (e.g., a link inside a table on a web page).
To use the UI Explorer to adjust a captured selection:
1.At the upper left corner of the Add Control dialog, click ![]() .
.
The Add Control dialog is hidden. The UI Explorer popup opens, with the currently captured control highlighted. In the application, the currently captured control is indicated by a red frame.
2.From the UI Explorer popup, select the required control from the tree. As you scroll through the control tree, the selected control is indicated in the application by a red frame.
Note: To make the red frame visible, verify that the |
3.When the correct control is highlighted, at the bottom of the UI Explorer popup, click Ok.
The Add Control dialog opens.
4.Review the attributes of the selected control. If you modify the attributes, it is recommended to click Verify to ensure that JIA can locate the control.
5.Click Add.
The control is added to the Repository tree. The capture tool remains open so you can continue capturing other controls.
Verifying Repository Elements
The Verify feature enables you to perform a validation check on any element in the Repository (application or control) to ensure that it is accessible to JIA. Objects that have been successfully verified are able to run in the code of a JIA project.
It is recommended to do a validation test after modifying binding attributes or following any other change in the application. If verification fails, check the binding attributes or recapture the control.
To verify an element:
1.Verify that the relevant application is running and open on the desktop.
2.In the Repository pane, select the application or control that you want to validate.
3.From the toolbar, click ![]() . Alternatively, from the Repository tree, right-click on the object and select Verify.
. Alternatively, from the Repository tree, right-click on the object and select Verify.
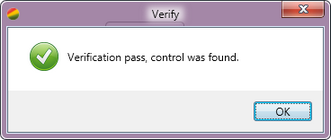
If verification succeeds, the relevant control is indicated in the application by a red frame, and the following popup opens:
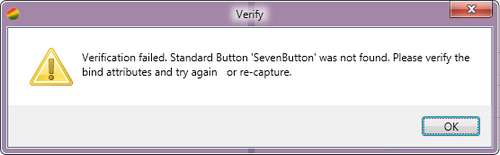
If verification fails, the following popup opens: