Adding Applications
Adding an application involves specifying a name and channel type for the application, and then defining application settings. The application key is generated automatically by the system, and embedded into your application.
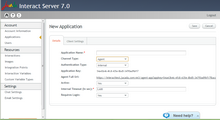
1.At the upper right corner of the Applications page, click Add. The New Application page opens, with Agent Application settings displayed by default. 2.In the Application Name textbox, enter a relevant name for the application. 3.From the Channel Type dropdown list, select the appropriate channel type (Agent, Mobile Web, etc.).
4.By default, a newly added application is active. To make the new application inactive, from the Active dropdown list, select No. 5.Configure the other application settings as required. For a detailed explanation of all parameters, refer to Understanding Application Settings. 6.At the right upper corner of the page, click Save. A confirmation message is displayed. The Applications page opens, with the added application listed in a new row of the Applications grid. |

