Admin Console
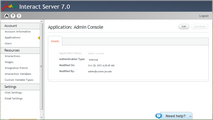
The following example shows the settings for the Admin Console:
The settings are listed and described in the following table.
Setting |
Description/Notes |
|---|---|
Application Name |
The name Admin Console is predefined, and may not be modified. |
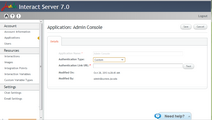
Authentication Type |
•Internal: Authentication is based on an internal database controlled through the Admin Console. •Custom: Authentication is based on an external authorization server that operates according to Jacada Interact's security specification. For more information, refer to Authentication Overview. |
1.From the Applications page, in the first row of the grid, click the Admin Console link. The Application: Admin Console page is displayed. 2.At the right upper corner of the page, click Edit. The Authentication Type setting becomes editable. 3.From the dropdown list, select Internal or Custom, as required. 4.If you select the Custom authentication type, enter the Authentication Link URL. (This is the full URL path to the relevant AuthLink server.) Clicking Test tests the connection to the server. 5.At the right upper corner of the page, click Save. A confirmation message is displayed, and the Applications page opens. Changes are saved in the system. |


