Configuring a Buttons Matrix

Contents
The choices of a multiple choice question type can be displayed in various forms (list, radio buttons, etc.). In most forms, the choices are displayed vertically only. Using the Buttons Matrix option enables you to display the choices in table form. In addition, you are able to specify the matrix position of each choice.
The buttons matrix provides a wide range of flexibility in designing the layout of choices. A matrix can hold up to 4 rows, and up to 7 columns. Matrix cells may be left blank, to provide more space between the actual choices. In the following 3-row matrix example, the center cell is left blank. This option is not possible in traditional display options, e.g., radio buttons, etc.).

In the example below, the choices are presented side-by-side. This layout is also not supported by other display options.

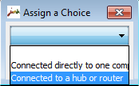
Assigning a choice to a cell in the matrix involves selecting the relevant cell, and then choosing the desired option from the Assign a Choice popup window. A choice can be assigned to only one cell at any given time. To move a choice to a different location in the matrix, you need to unassign the choice from its current cell, and then reassign it to the target location cell. To assign a choice to a matrix cell: 1.From the buttons matrix, select the relevant cell. The Assign a Choice popup opens, listing all defined choices that are not currently assigned to a cell.
2.From the list, select the choice to be assigned to the cell. Alternatively, to unassign a currently assigned choice, select the blank space at the top of the list. 3.Click OK. The cell label is updated, as selected. Cells to which a choice is assigned are labeled with the name of the assigned choice. Blank cells are labeled Click to assign. |