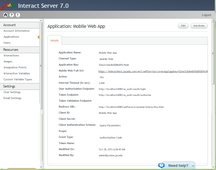
Mobile Self Service Application
The following example shows the settings for a Mobile Self Service application:
The settings are listed and described in the following table.
Setting |
Description/Notes |
|---|---|
Application Key |
An identifier that is defined in the Jacada Interact Admin Console and embedded in the user's mobile application. The application key is generated automatically when an application is added. |
Mobile Web Full URL |
The full URL path to the list of Interactions available for this application channel. |
Active |
Indicates whether the application is currently active. The application key of an inactive application is disabled, and users are unable to access Interactions. |
Internal Timeout |
The period of time (in seconds) during which the client can send requests without the need for revalidation of the access token by the authorization server. |
User Authorization Endpoint |
The full URL path to the Login page for the authorization server. |
Token Endpoint |
The full URL path to the authorization server (used to obtain an access token). For more information about the authentication process, refer to Oauth2 Authentication Workflow. |
Token Validation Endpoint |
The full URL path to the authorization server used to verify the validity of an existing access token. This setting is not mandatory. |
Redirect URL |
The location to which to return after the access token is granted. |
Client ID |
These parameters are those provided by the 3rd party authorization server, at the time of client registration. |
Client Secret |
|
Client Authentication Scheme |
Query Parameters or Header Parameters. This value is provided by the 3rd party authorization server, at the time of client registration. |
Scope |
The set or types of data that may be retrieved by the access token. |
Grant Type |
Authorization Code is supported. |
Token Name |
The access token name used by the authorization server. To use the default value (access_token), leave this parameter blank. |
1.From the Applications page, in the row of the relevant Mobile Self Service application, click the Application Name link. The Application Details page is displayed. 2.At the right upper corner of the page, click Edit. The fields become editable. 3.Update settings, as required.
4.At the right upper corner of the page, click Save. A confirmation message is displayed, and the Applications page opens. Changes are saved in the system. |


